Color Correction

Easy skin tone selection

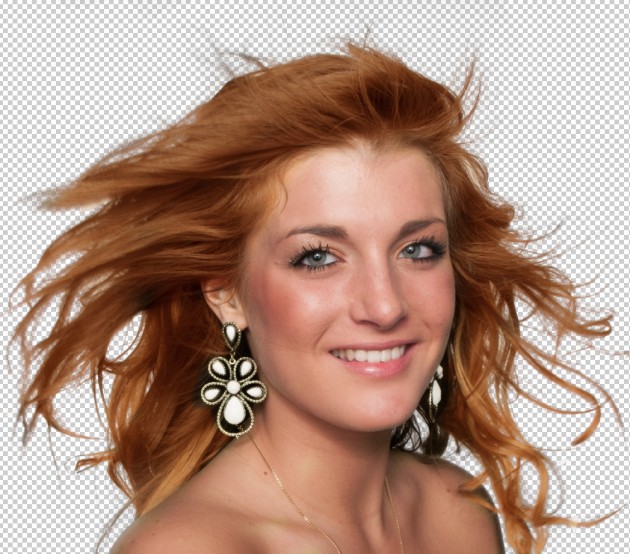
In our studio, we have to work most of the time with photos of people. Many times we are required to work on facial enhancements. This requires us to make selection of facial portion of the images. It was always manual process to select only the skin tone of such images for further retouch, color adjustments and facial enhancements. Quiet a tedious work!! Photoshop CS6 has come up with new option to ease this process. All we need to do is – go to color range selection > enable detect face option > from dropdown menu select skin tones and then increase or decrease the fuzziness slider as per our requirement. That’s it and you get the required selection for

Read More »

Quick steps to change hair color

If you are wondering about easy steps to change hair color in Photoshop, here are the rapid steps to get the desired result: Take already cutout model image and create a duplicate layer. Apply soft light blending option to the duplicate layer. Select a soft brush and apply required color only on the hair part of the model in the duplicate layer as in the sample shown below: Take the selection of the cutout model and remove the parts outside the selection. After that, in the duplicate layer; using masking or erase tool, remove the facial part other than the hair. You will get the final output. If you intend to adjust or change the color of the hair, with

Read More »

Recover the detail of the image

Direct images from camera misses the detail of the image in it. In Photoshop CS5, we can recover back those details of the image using the HDR Toning feature. This feature allows the user to apply HDR like tone mapping to single image. Steps to follow are pretty simple: After opening image in Photoshop, go to Image > Adjustment> HDR Toning. You can see the preview of the change in the image already when the dialog box appears. As per the requirement, glow, tone and detail, color and toning curves & histogram can be adjusted. Edge Glow helps to regain bright areas settings. The radius value sets the size of the bright areas and the strength sets the distance required

Read More »

Easy technique to recolor products in Photoshop

With the help of Recolor Tool in Photoshop, we can change the color of the product images to any color of the user’s choice in just a few clicks. All one needs to do is open file in Photoshop and go to Image > Adjustment > Replace Color. In the replace color palette, user can select the colors of part of the image with the help of the eye dropper tool. Add to sample, eye dropper tool helps the user to select more than one color at a time. Once the user has selected all the required colors of the image, now s/he can now adjust the value of the color to the desired one through the adjusting the hue,

Read More »

Removing colorcast from images

            Image Source: Arnoldmed Sometimes due to the background color, lightning or camera settings, the images get some sort of color cast. As you can see in the example file above, when this image is cutout and placed in different background then the cyan color cast is pretty disturbing to the product. In such case when one color disturbs the color balance of the product, one of the simplest ways to fix it, is through hue and saturation tool in Photoshop. You can make a copy of the original image layer, select the product path and go to Image adjustment > Hue and saturation. Then simply choose the cyan color in the hue/saturation palette and

Read More »

Color correction using Selective color option

                  Image Source: Pointofsports Similar to our first article, in this category also we are looking at different tool which helps to remove the unnecessary colors from the image after we remove background from it. As shown in the example above, you can see that the portrait of the lady when cutout from the background leaves a green color at the edge of the cutout lady. In order to remove this, we can use selective color option in Photoshop. First select the edges of the lady where the green color is appearing and apply feather with 0.5 – 0.8 value. Then go to Image > Adjustment > Selective Color. Since the green

Read More »