admin

Focus Mask

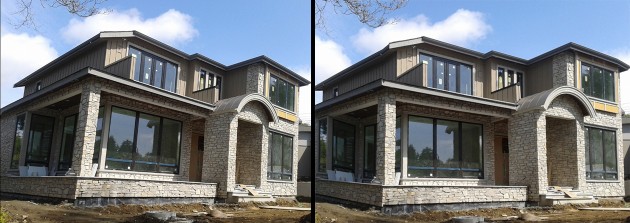
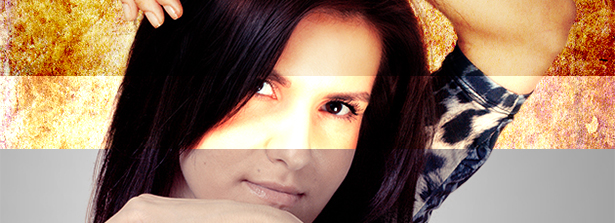
There is a new add up feature  in Photoshop CC 2014 – Focus Mask, for selecting images based on focus area. With the help of this tool it is very quick and easy to cut out images in limited period of time. Go to – Select > Focus Area Photoshop will automatically analyse the image based on focus area. As per our requirement, we can add or subtract other areas of image. We can also adjust parameters option for a better result. With Auto button turned on it helps to pick correct depth of field automatically. For even better result we can also make adjustment in the Refine mask option. Here is an example of before and after the mask

Read More »

Perspective Warp in CC 14.2

All photographers do not get correct perspective in images whether it is a one point, two points or three point perspective photography. Every time re-shooting images to make the correct perspective isn’t an option. Photoshop CC 14.2 gives us a new feature as a solution to issue of perspective using a new 3D feature grids named as Perspective Warp. It is improvised feature of old tools like distort transform option, vanishing point etc. Let’s check out one example done with new “Perspective Warp” tool. Raw Image: Go to Edit > Perspective Warp. Similar to vanishing point, select the area that needs to be corrected. New thing, here you can drag two or more than two boxes depending upon the perspective

Read More »

Removing fringes while creating compositions

While cutting out or transforming images, some of the pixels surrounding the selection border are included with the selection; this can result in a fringe around the edges of the edited selection which results in low quality output on image manipulation. We can off course fix it with Pen Tool which guarantees best output but rather requires longer time and involves lots of hard work. So, for the quick result with quality intake; here are some simple steps that can be followed to overcome those fringes. Here we have two images that need to be complied together. End result will be ship sailing on the sea.  As seen below, ship gets lots of fringes in rope areas when placed in

Read More »

Blending modes in photoshop

Understanding blending modes in Photoshop is essential for image editing and manipulation. Blending modes in Photoshop CC determine how the pixels on one layer interact with pixels on lower layers and how painting tools interact with pixels already present on the active layer and layers below. It is one of the easiest and fastest ways to tweak and enhance photos.  Applying these blending modes is very easy, experimenting with different modes is fun and easy as well. Here are some of example files done with the help of blending options in Photoshop. Raw files:               Output files: Using Color Burn Mode: Using Lighten Color Mode: Using Overlay Mode: Using Color Mode: Using Multiply Mode:

Read More »

Resize image using Fit Image

We often get resizing project from our clients where they ask to resize longest side of images to given size. When we have to do it for one image, we can always use image size option for this. But, imagine if we have to resize 1000 raw images (including both horizontal and vertical raw images) with longest side changed to 800 pixel maintaining proportions of images. Still use image size option? That will take really long time. There is a quick solution for this in photoshop. The solution is to use the Fit Image command to specify a maximum width or height and Photoshop will make sure that the width or height doesn’t exceed the chosen amount while constraining proportions.

Read More »

Smart spot removal in CC

One of the interesting features in CC is its Camera Raw updates. With new camera raw update, we can now use this feature in any file format, even if image is not taken in raw format initially. Today we will be looking at new tool in camera raw dialog box – Spot removal tool which is useful in removing unwanted part of the image in just a few clicks. Before starting with it, convert your file to smart object and apply filters as non-destructive sub layers. Main advantage of doing this is: filter will now appear as sub-layer. This allows you to hide filter effect any time from Layers panel as well as by double clicking the filter sub-layer; you

Read More »