Image Manipulation

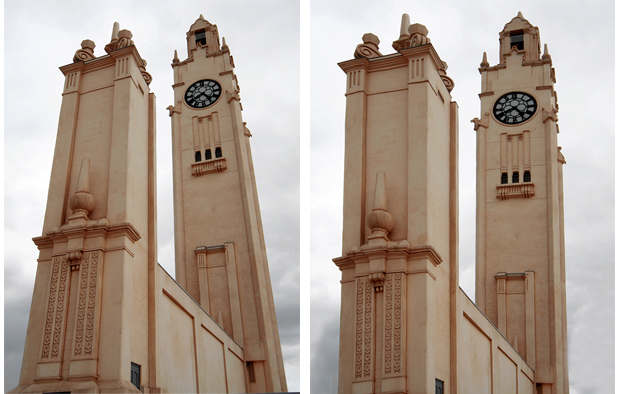
Using Tilt-shift blur in CS6

Today’s  Tilt-shift blur topic would be our last articles on blur series that we have been discussing since last two weeks. It’s an easier feature to use and helpful to give miniature effect to the images. Raw Image: As other blur options, you can find tilt-shift also in Filters > Blur > Tilt Shift. You will see two straight lines, two dotted lines and circle appear in between of the image. As in other blur options, with circle in between we can adjust the amount of blur to be applied. By simply clicking  and dragging any of the lines, you can make selection area smaller or larger. Also you can roll over the white dot on the inside line and then drag to

Read More »

Using Iris Blur Filter in CS6

Last week, we discussed about Filter Blur. Today we will look into second type of blur available in filter option of CS6 – Iris Blur. In Filter Blur, we applied blur with the help of pins. In Iris blur, we again use similar multiple pins but here we have more control on how we want to apply the blur effect than in field blur. In each pin, we can define area covered, angle, density of blur to be applied and also change the shape of the area selected. As in field blur, in Iris blur also – we can apply as many pins as required in an image and those pins can be moved easily by dragging in required areas.

Read More »

Using Field Blur Filter in CS6

If you haven’t checked Field Blur yet, you are gonna love it. With this filter option, you can apply blur effect to only required areas of an image keeping other parts sharp / focused. It gives you flexibility to apply blur in the specified areas only using pins. One can apply as many pins as required in an image. You need to make sure that in blur area, pin should have value from 5% to 100% and in sharp area, pin should be kept with value 0%.  Those pins can be easily moved from one part of the image to another by simply dragging it and to delete any pin, just select any pin and click delete. Here is an

Read More »

Turning images to nice piece of art!

Filters in Photoshop are helpful tool to apply effects to any images. With new Oil Paint Filter of  CS6 version, we can easily give any images a painted look. All you need to do is open image in Photoshop, go to filter > Oil Paint and adjust the Brush and lighting settings as per your requirement.   Here is an example: Before Image: End Result:

Read More »

Adaptive Wide Angle Filter

Many times while photographing image, we can’t capture as much area of the image as we desired due to the constraint of space. This forms rounded edges and bent lines in the captured images. In order to overcome this, we can use the new feature of Photoshop CS6 – Adaptive Wide Angle Filter. This filter helps to straighten the bent lines and curves of images taken with fisheye or wide angle lens. Here is an example how to use this filter option to straighten the bent lines: Raw Image: Choose Filter > Adaptive wide angle. In the right side, choose the “Perspective” from correction drop down menu. Using the constraint tool from the top left of the tool palette, draw

Read More »

Underwater

The image of the lady is cutout and placed in the background. Bubbles is added and color of the composition image is changed to get the final output. Image Source: Blickart

Read More »