

Correcting lens distortion in CC
Normally when buildings are photographed from ground, it appears leaning backwards with sides instead of being parallel to each other. We often get such images of buildings in our studio for perspective correction. As mentioned in our earlier article of August last year, we used to fix such issues using adaptive wide angle filter option where we drew constraint lines and rotate angle to adjust perspective of buildings. Adobe CC has made such task even more easier with automatic perspective
Smart sharpen in CC
In Photoshop CC, Adobe has improvised it’s filter section all over. New Smart Sharpen filter (Filter > Sharpen > Smart Sharpen …) gives us an opportunity to improve image sharpness while minimizing noise and halo effects. In the filter’s dialog box, you can control the parameters Amount, Radius, Reduce Noise and choose what type of blur need to be eliminated. We can control the amount of sharpening that occurs in shadows and highlights. It’s much easier to use and gives
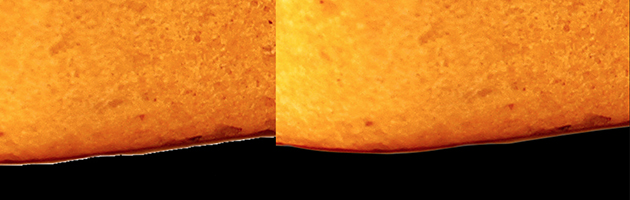
Removing edge halos after cutout
When we cutout images specially with automatic selection tool in photoshop and apply contrasting background behind it, we often get unwanted fringing that’s comprised of stray pixels, and looks like a fuzzy halo around certain parts of the image. With the help of defringe option in photoshop, we can get rid of such fringes of the image. After opening image in photoshop, with selection of foreground layer click Layers > Matting> Defringe. Enter pixel value for defringing. Really easy way to
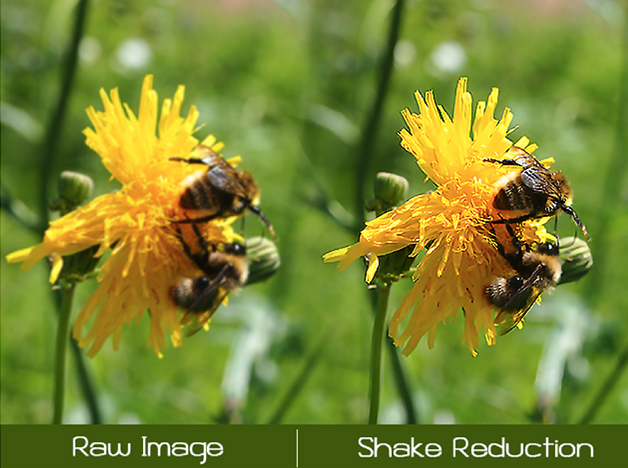
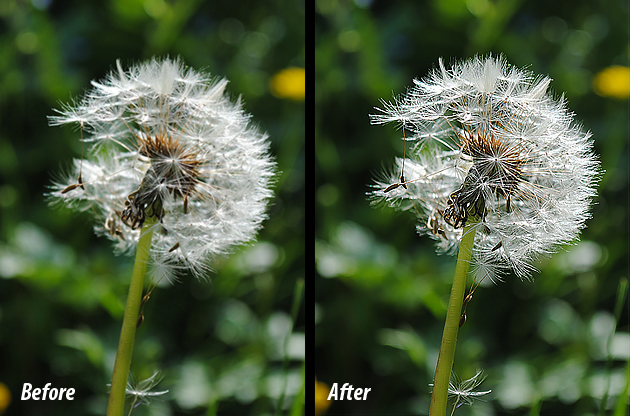
Photoshop CC Feature: Shake Reduction
We posted about Intelligent Unsampling earlier, upgraded feature of Photoshop CC. Giving continuity to this, we have come up with the new feature: Shake Reduction on Photoshop CC. As a photographer, we have known many times due to camera shake and vibration our photo wouldn’t be as nice as the result we want. There aren’t always chances to re-photograph in such cases. So Photoshop CC has its added feature ‘Shake Reduction’ for which photographers likely didn’t think possible. Therefore this
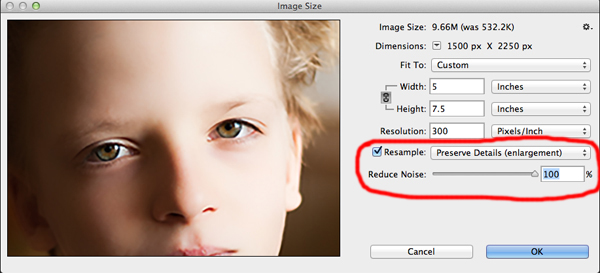
Intelligent Upsampling in Photoshop CC
Adobe has released CC version of Photoshop with some really exciting new features in it. We will continue posting articles on new features of CC in coming weeks relevant to our work area. Today let’s check out one of its upgrading feature: Intelligent Upsampling In previous versions of Photoshop, if we needed to convert web version images to printable format then we always had issue on quality level and it required lots of manual adjustments to achieve a compromising quality
Reduce PSD File Size Without Quality Loss
Reduce PSD File Size without Quality Loss When file size is heavy, unnecessarily much time is spent. File size matters when sharing via any means. As a solution to lessen file size, many designers reduce the resolution of their PSDs which results on reduced quality as well. With some simple tricks mentioned below, file size of a PSDs can be reduced without losing its quality. You can either follow one or all of the options below to reduce file size. 1. Put a solid white layer on Top Photoshop’s high quality file previews are weighty. Hide all your work behind a solid white layer on Top. 2. Only keep the Essentials It’s easy to forget some of the junk that accrues as
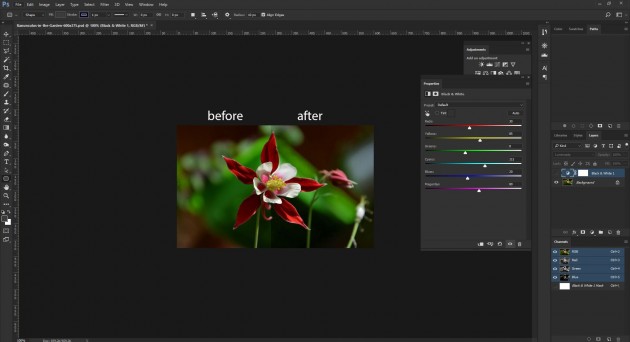
B/W Adjustment layer to alter color
We have discussed various methods of adjusting color in images before. Today we are going to explain one more extra option to alter color in images within least possible time and higher precision. We are going to use adjustment layers for color correction. This may not be new to some of us, but for those who don’t know, you will surely appreciate it. All that’s involved in this case is to create a black and white adjustment layer; then change the blend mode to Luminosity, and finally using the sliders to make the desired alternations on colors. That’s it. Adjustment layers are usually better than using other options because they will remain editable in later days after changes are made