

Recover the detail of the image
Direct images from camera misses the detail of the image in it. In Photoshop CS5, we can recover back those details of the image using the HDR Toning feature. This feature allows the user to apply HDR like tone mapping to single image. Steps to follow are pretty simple: After opening image in Photoshop, go to Image > Adjustment> HDR Toning. You can see the preview of the change in the image already when the dialog box appears. As per
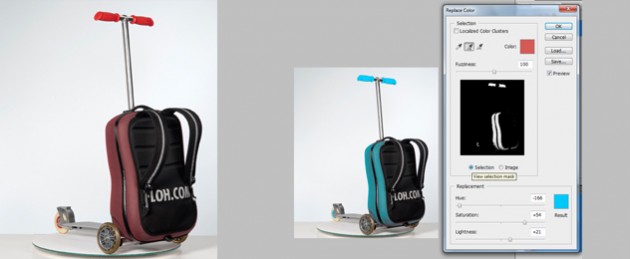
Easy technique to recolor products in Photoshop
With the help of Recolor Tool in Photoshop, we can change the color of the product images to any color of the user’s choice in just a few clicks. All one needs to do is open file in Photoshop and go to Image > Adjustment > Replace Color. In the replace color palette, user can select the colors of part of the image with the help of the eye dropper tool. Add to sample, eye dropper tool helps the user
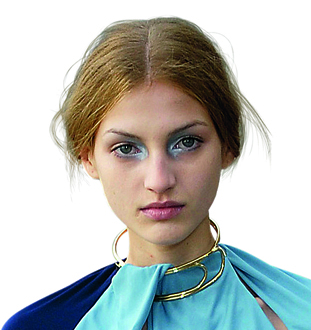
Manual Brushwork to maintain loose hairs
Image Source: Roularta Often alpha masking can’t help us maintain the loose hairs while cutting out the image like one shown above. This is where the manual brushwork comes handy. With the help of pen tool, you can easily create the shape of the artificial hair and define it as a brush using EDIT > Define Brush option. By applying alpha masking, you get the similar output as in image
Roses
Designed by- Sharnima Rajbanshi; Download: 1280 X 1024, 1440 X 900, 1680 X 1050, 1920 X 1200
Lost World
Designed by- Bishal Manandhar; Download: 1280 X 1024, 1440 X 900, 1680 X 1050, 1920 X 1200

Removing fringes while creating compositions
While cutting out or transforming images, some of the pixels surrounding the selection border are included with the selection; this can result in a fringe around the edges of the edited selection which results in low quality output on image manipulation. We can off course fix it with Pen Tool which guarantees best output but rather requires longer time and involves lots of hard work. So, for the quick result with quality intake; here are some simple steps that can be followed to overcome those fringes. Here we have two images that need to be complied together. End result will be ship sailing on the sea. As seen below, ship gets lots of fringes in rope areas when placed in
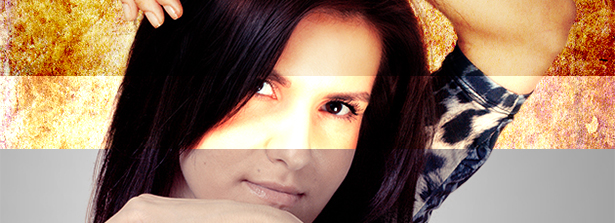
Blending modes in photoshop
Understanding blending modes in Photoshop is essential for image editing and manipulation. Blending modes in Photoshop CC determine how the pixels on one layer interact with pixels on lower layers and how painting tools interact with pixels already present on the active layer and layers below. It is one of the easiest and fastest ways to tweak and enhance photos. Applying these blending modes is very easy, experimenting with different modes is fun and easy as well. Here are some of example files done with the help of blending options in Photoshop. Raw files: Output files: Using Color Burn Mode: Using Lighten Color Mode: Using Overlay Mode: Using Color Mode: Using Multiply Mode: