
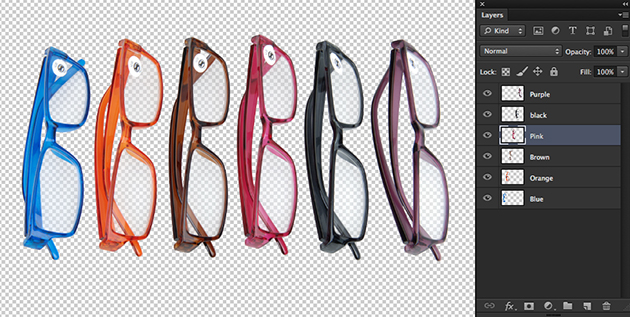
Auto script to save layers as files
In many cases, we are required to save different layers as separate files at the end of image processing. Especially, when we are working with group product image, where each product in the image needs to be processed and saved as separate files. In such case, it might be good to save each layer as different files manually when you are working with few files. But just imagine if we are doing same thing for hundreds of group images at
Creating logo using Photoshop CS6
Photoshop is massively used for photo editing, adding effects and creating graphic designs and web designs. It is better known for its pixel based output. Nevertheless, Photoshop also contains tools to help create logos that can be used for prints and various media platform. We no more have to fear that logo created in Photoshop will lose its quality when enlarged to larger dimension or resolution. Using simple tools of Photoshop CS6, we can easily create vector quality logos. This
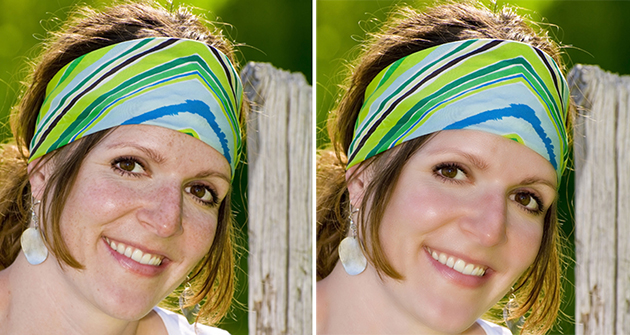
Removing blemishes
Everyone using photoshop must have used clone tool, heal tool or patch tool for removing pimples and blemishes. Today we will look at new method that will do the same work in pretty less time. Get an image of a model with needs skin retouche. Duplicate layer and then in the layer palette, change the blending option to
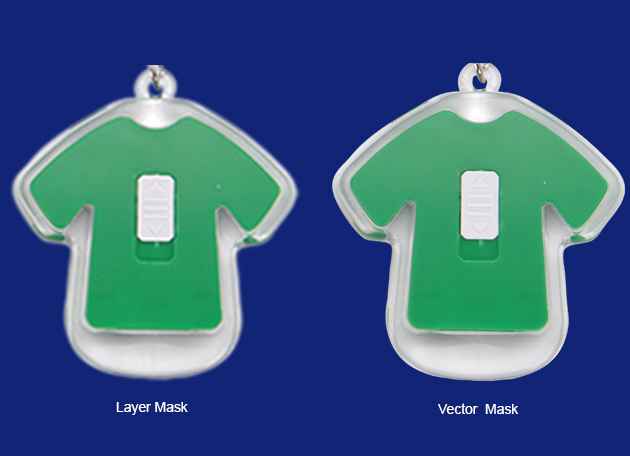
Using Vector Mask for best quality
You must have noticed that when you use layer mask, it creates a soft edged mask around the selected area of the object. Later when you transform such masked area, you will get jagged edged object. The quality of the image degrades if such image is transformed or converted into higher resolution later on. We can avoid this by using vector mask. Make a selection using a path or take an object created using shape tool. Then convert the path
Using Tilt-shift blur in CS6
Today’s Tilt-shift blur topic would be our last articles on blur series that we have been discussing since last two weeks. It’s an easier feature to use and helpful to give miniature effect to the images. Raw Image: As other blur options, you can find tilt-shift also in Filters > Blur > Tilt Shift. You will see two straight lines, two dotted lines and circle appear in between of the image. As in other blur options, with circle in between we can adjust
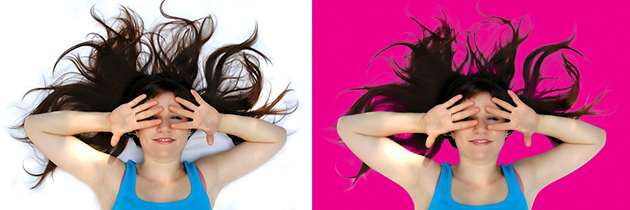
New Select and Mask Feature
Good news for Refine edge users! In latest Photoshop 15.5, this tool has been improvised and revamped as select and mask feature (Refine edge option is no longer available now). It’s much easier now to make selections of tricky areas such as hair, furs, etc with this new feature. Let’s see how to use it. Below is sample raw file we will use: We can start by making rough selection of model with any automatic selection tool or path at first. If you don’t want to do it, just turn on quick selection mode. Go to: Select > Select and Mask We will get tool bar at left side
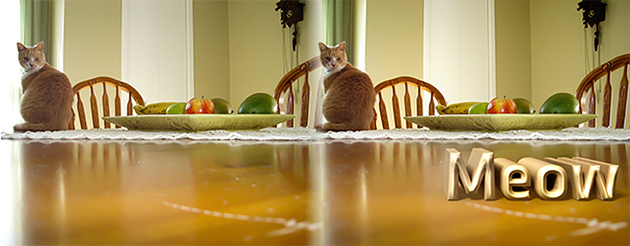
Create 3d text in Photoshop
Creating own 3d text has become really simple since introduction of CS6 version of Adobe Photoshop. There are different 3d options available in latest version of Photoshop which has broaden its scope for designers from different fields. Today we will look at how to create 3d text in Photoshop with few clicks. Here’s a small example how you can create your own 3d Text: Step 1: We have taken following Image to add text “Meow” on it. Step 2: Right click on the text layer and select: “New 3D extrusion for layer” Option. A box pops up which says switch to 3d workspace. Click “yes” to begin. Step 3: After you switch to 3d workspace, you text layer is changed